In August of 2014, I ordered an All Terrain Bobcat shell after touring the factory in Sacramento, CA. After a few agonizing months waiting for it to be built, they delivered and installed it right in my driveway. I then got busy building the interior to suit my needs. The build was half the fun and will probably always be a work in progress.
DELIVERY DAY

 |
| They gave me a full run down of its workings and let me get back to work. |
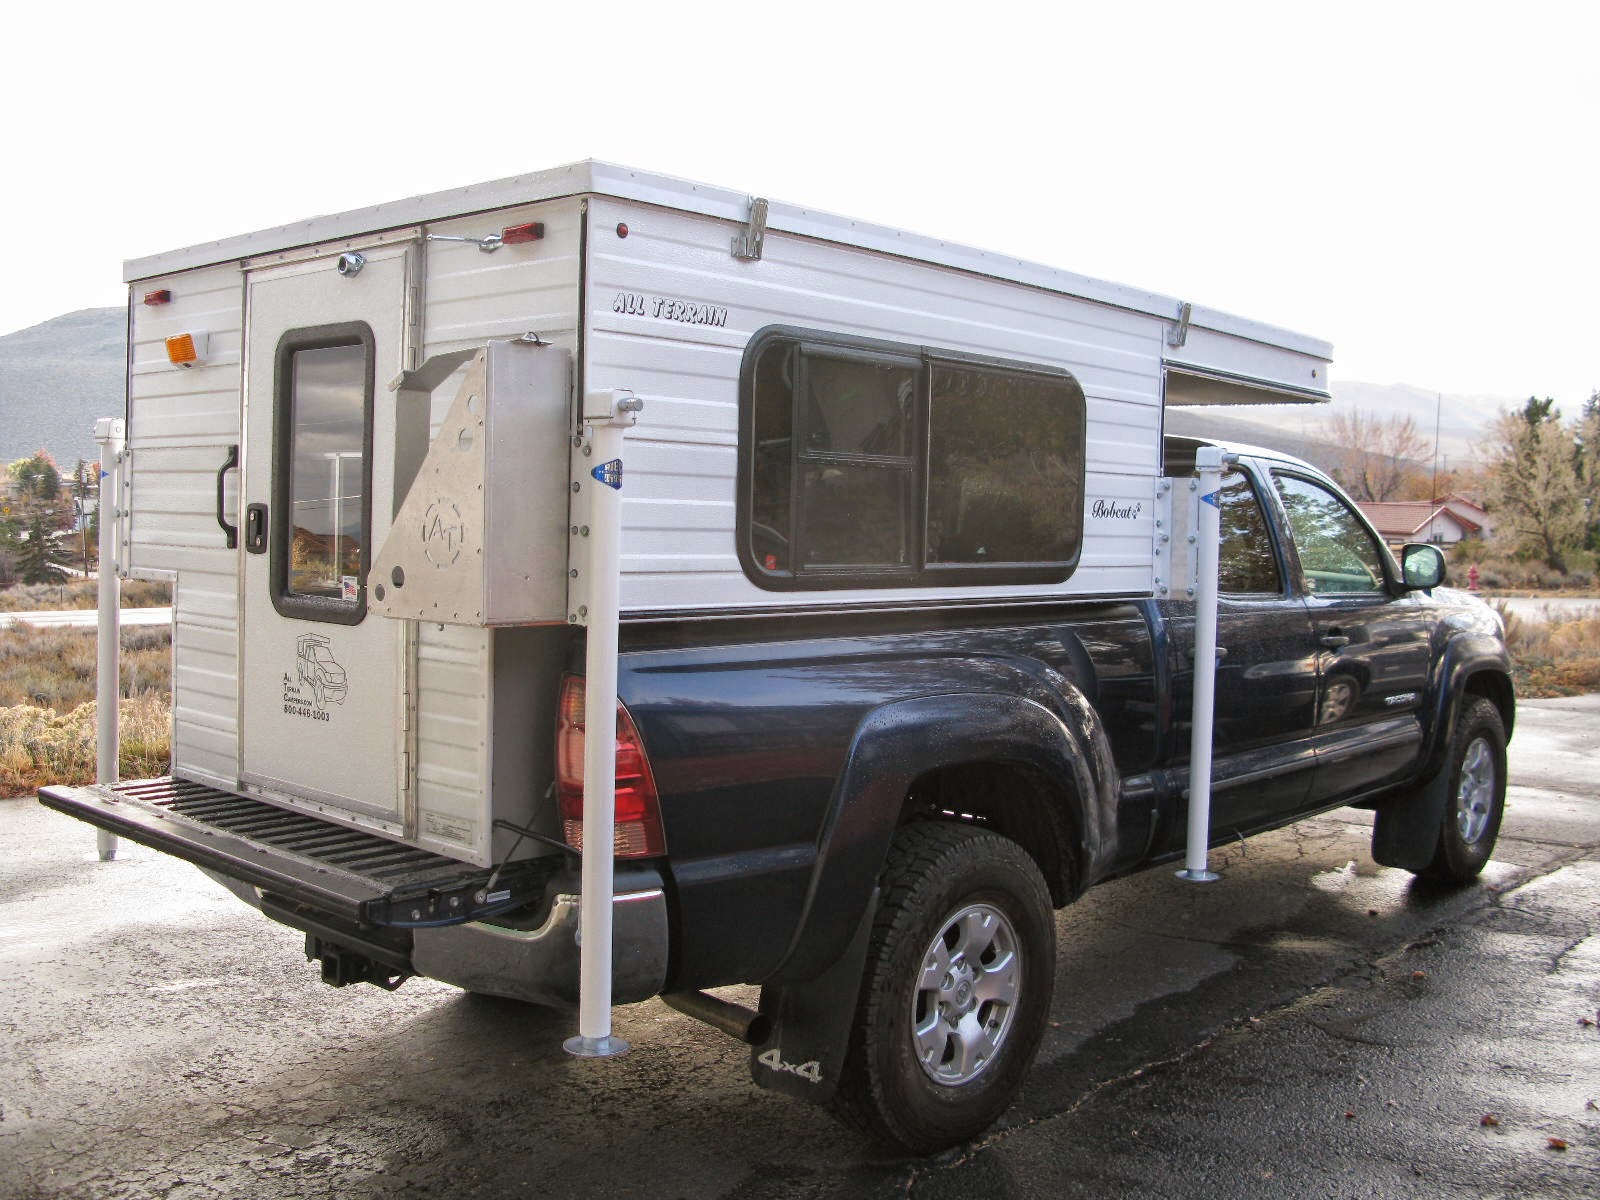
I wasn't back at work a half an hour before they called me and told me I was ready to go. I was so excited to get this set up and start camping.

Dexter on guard doody...
After a lot of head scratchin, note takin and Internet searchin, I came up with a final plan for the interior. I knew wanted something very BASIC, so here's what I came up with.
I decided to use only gravity fed water into a sink that drained to the outside. I have a single deep cycle RV battery, which powers the LED lights, a small inverter and a couple of 12v DC plugs. The battery is wired to the truck's alternator with an isolator, so the truck will charge it, but the camper will never draw from the truck battery--only the RV battery.
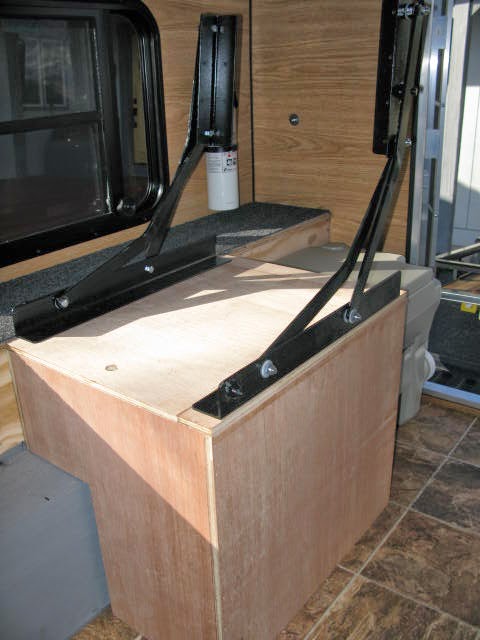
THE ROLLOVER HINGE


I knew I wanted a rollover chair so that my small dinette would convert to a narrow bed in case I ever needed and extra bed or if I ever had to stealth camp (camp without raising the roof).
I couldn't find a rollover hinge for sale anywhere and believe me, I looked, so I set out to make my own. As you can see, it's a very complicated hinge, but luckily for me, I have a neighbor who has a rollover couch in his pop up and he let me study his and take detailed measurements that proved to be invaluable to me. I spent a good chunk of one weekend heating, hammering and cussing, but I finally got the hinges together in the "rough draft" that you see above.
THE CABINETRY
 Next, made my propane cabinet and fit it into place. I know it's not recommended to put the propane cabinet inside the camper, but since I'm building a very basic camper and I don't have propane piped all over to different appliances, I figured I could do this safely.
 I made a dinette chair that would also house the battery and electrical inside it.
 The other dinette chair would support the rollover hinge and have extra storage underneath it.

 Everything was rough fit together...
 All of the box cabinets were primed and painted.
 Then the cabinets were mounted into place.
 A look inside the battery compartment. The battery isolator is mounted inside.
 The finished rollover hinge is mounted and ready for upholstery.
 A look inside the storage compartment.
THE LATRINE

The latrine cabinet lifts up so you can do your business with the toilet in place.

THE PROPANE CABINET

The propane cabinet will hold up to a 20 lb. bottle, but here I'm using a smaller 11 lb. bottle. There's enough room in the cabinet for a lantern or a few small green propane canisters.

I didn't need to put a lock on the propane cabinet, but I needed a latch that was flush with the cabinet front, so that it would lie flat on the floor when opened.
 Here's a view from atop the sleeping bunk.
THE ROLLOVER DINETTE

I had the cushions made for me by a local upholsterer and they did a fantastic job.

 Here's the rollover dinette in the down/bed position.
THE DINING TABLE
 I started by cutting out a table blank and rounding the corners.
 I ordered some vintage "Boomerang" pattern Formica for the table and counter tops.
 I applied the Formica and put an aluminum edge band around it for a vintage look.
THE MAIN COUNTER TOP AND STORAGE BINS

The main counter with storage cubbies.

 As you can see, there's a lot of storage in these bins.
 You have to have the little niceties...

Here's the counter top with the sink and cook top mounted.

THE ELECTRICAL SYSTEM
 Before
 and after cleaning up the wiring.
 Here's the small panel for the inverter and 12v outlets.
CURTAINS
 I made a three phase curtain system. Here is the blackout curtain down.
 Here's the sheer curtain down.
 And here's with both shades tied up.
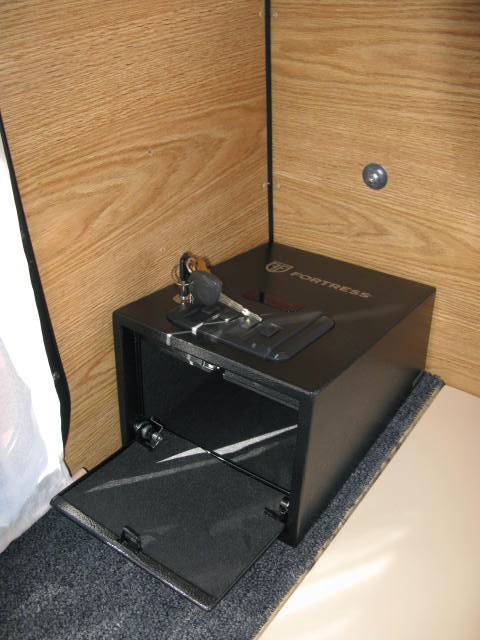
THE LITTLE EXTRAS

I mounted a small gun safe to lock up valuables when away from the camper.
 A first aid kit is a must!
 I know I sound paranoid, but I mounted a knife on the bed rail so that I can always find it if I ever need to cut myself out of the camper for any reason.

The rear door window bumped against the Jerry Can holder, so I came up with this little bumper to protect the glass.


Kind of looks like an ordinary Jerry can...


Here is a very cool little ladder for roof top access when I carry my kayak and Yakima box on top.

My Homemade Awning
It took a couple of tries, but I finally came up with a workable, lightweight, easy, simple and cheap way to get a little shade.
I took a military rain poncho and sewed a rope welt along one end. On the other end, I doubled over the fabric and sewed a channel for a tent pole to slide through. I then bought some webbing and hammered in a few grommets and viola, an awning was born.


After a lot of head scratchin, note takin and Internet searchin, I came up with a final plan for the interior. I knew wanted something very BASIC, so here's what I came up with.
I decided to use only gravity fed water into a sink that drained to the outside. I have a single deep cycle RV battery, which powers the LED lights, a small inverter and a couple of 12v DC plugs. The battery is wired to the truck's alternator with an isolator, so the truck will charge it, but the camper will never draw from the truck battery--only the RV battery.
THE ROLLOVER HINGE
I knew I wanted a rollover chair so that my small dinette would convert to a narrow bed in case I ever needed and extra bed or if I ever had to stealth camp (camp without raising the roof).
I couldn't find a rollover hinge for sale anywhere and believe me, I looked, so I set out to make my own. As you can see, it's a very complicated hinge, but luckily for me, I have a neighbor who has a rollover couch in his pop up and he let me study his and take detailed measurements that proved to be invaluable to me. I spent a good chunk of one weekend heating, hammering and cussing, but I finally got the hinges together in the "rough draft" that you see above.
THE CABINETRY
THE LATRINE
The latrine cabinet lifts up so you can do your business with the toilet in place.
THE PROPANE CABINET
The propane cabinet will hold up to a 20 lb. bottle, but here I'm using a smaller 11 lb. bottle. There's enough room in the cabinet for a lantern or a few small green propane canisters.
I didn't need to put a lock on the propane cabinet, but I needed a latch that was flush with the cabinet front, so that it would lie flat on the floor when opened.
THE ROLLOVER DINETTE
I had the cushions made for me by a local upholsterer and they did a fantastic job.
THE DINING TABLE
THE MAIN COUNTER TOP AND STORAGE BINS
The main counter with storage cubbies.
Here's the counter top with the sink and cook top mounted.
THE ELECTRICAL SYSTEM
CURTAINS
THE LITTLE EXTRAS
I mounted a small gun safe to lock up valuables when away from the camper.
The rear door window bumped against the Jerry Can holder, so I came up with this little bumper to protect the glass.
Kind of looks like an ordinary Jerry can...
Here is a very cool little ladder for roof top access when I carry my kayak and Yakima box on top.
My Homemade Awning
It took a couple of tries, but I finally came up with a workable, lightweight, easy, simple and cheap way to get a little shade.
I took a military rain poncho and sewed a rope welt along one end. On the other end, I doubled over the fabric and sewed a channel for a tent pole to slide through. I then bought some webbing and hammered in a few grommets and viola, an awning was born.


No comments:
Post a Comment